
BENTLEY RHYTHM ACE FR-8L /
ROLAND TR-77 DRUM MACHINE:
A new page on converting the Roland TR77 to use a regulated external power supply can be found HERE.
We have a limited number of DIY trigger interface PCB's for the TR77 / FR8L available in the SHOP.
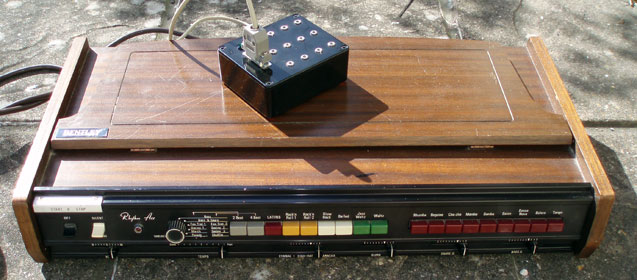
Why both names you might ask? Well, before Roland came into existence there was a company in the 70's called Acetone who distributed several drum machines of the 'sit on top of your home organ' variety. These machines were mostly firmly in the Rhumba and Bossanova camps and in the UK they were marketed under the name Bentley Rhythm Ace, which is as good a name as any i guess. Eventually all these distributors morphed into the mighty beast that was Roland in the late 70's and early 80's, but many of their product ranges seem to have been redesigned and sold as Roland machines, often at the same time as appearing under other names. One of these is the Bentley Rhythm Ace FR8L which is to all intents and purposes a Roland TR77 drum machine, the first product ever to bear the Roland name. The only differences is that the circuitboards and front panels are positioned differently and the TR77 features a Tambourine sound which is missing from the voice board of the BRA, despite the fact that the board has spaces and labels for the missing components. If you want to read more about the history of Roland, Sound on Sound has an excellent article HERE.
The BRA is an odd machine that appears to have been designed by a man with a mobius corkscrew for a brain. We won't go into full details here but if you want to try to get your head around the surreal way this thing works you wouldn't go far wrong taking a look at the Adam Baby page detailing the bizarre workings of the TR77 HERE
The BRA has no kind of syncing or external voice triggering so what were going to do here is document the installation of Midi triggering for the analogue percussion sounds, but before we start the first thing you need to do is replace the power filtering cap with something that isn't nearly 40 years old and nowhere near good enough for the job.
REPLACING CAPACITORS:
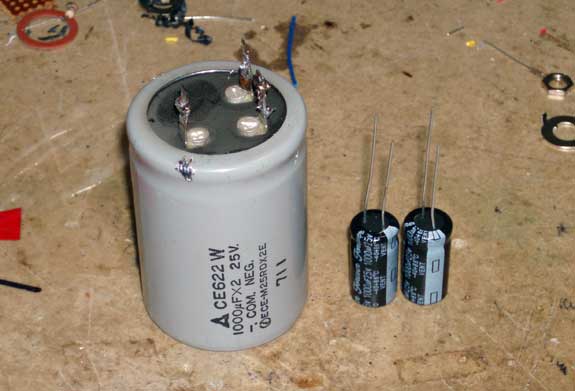
When we opened this thing up we found one massive 1000uF 25v dual capacitor (two caps in one can) that was supposedly filtering the AC wobble out of the power supply. Shown above is the original cap on the left compared to its modern equivalent on the right! We say 'supposedly' filtering the power supply as it was about as effective as a rubber hammer. For a start the 24v power rail was measuring well over 25v, which is what this cap is rated for, and it was wobbling all over the place. If you're even thinking about having a 24v power rail you should be looking at having at least 35v caps in the PSU, if not 50v. We replaced the original 1000uF 25v cap with a pair of decent quality 2200uF 50v caps which reduced the background hum and increased the stability of the whole machine no end.
We also have a new page on converting the Roland TR77 to use a regulated external power supply HERE. This mod gives a substantially lower noise floor with a lot less AC ripple on the power rails.
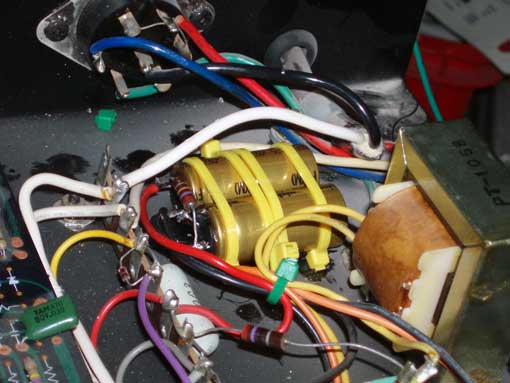
While we were at it, we also replaced the rest of the 40 year old electrolytic capacitors on all of the boards as a couple of them were looking a little suspect and it certainly can't hurt, especially as the caps in there were about 20 years past their reasonable working lifespan!
MIDI TRIGGERING:
The internal triggering in this thing works by feeding +12v positive trigger pulses into an edge detector circuit that spits out -12v negative triggering spikes to trigger the sounds. The spikes are sent on the downward slope of the input pulse. According to the service manual the initial trigger pulses are apparently 600ms long, which means if the sounds are triggered on the downward slope then the whole thing is running 600ms behind itself, or the sounds are at least! This could well be a misprint though, as most of the service manual is written in a weird japanglish hybrid language.
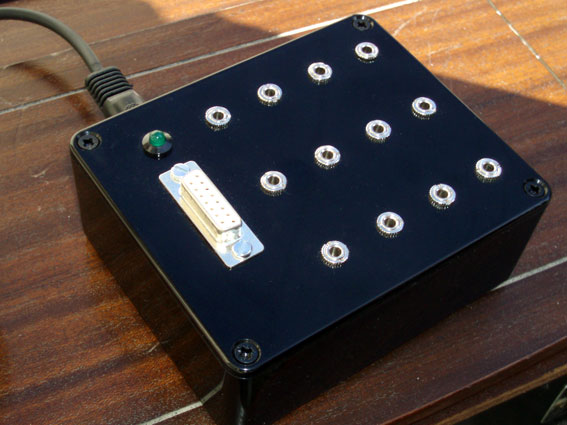
The first thing to do is get some kind of midi to trigger interface. You won't find one anywhere that will supply a -12v spike pulse, or even a +12v positive one but an excellent place to start is with the Engineers at Work 'midi to trigger interface' which can be found HERE. This is a superbly useful bit of kit which gives you 23 x +5v trigger outputs along with a master trigger and accent trigger output, and all for a decent price. We built this unit into an external trigger box with 12 outputs for the BRA on a D-sub connector, and the rest of the outputs on 3.5mm jacks, simply because they were available. You could easily build into the BRA / TR77 itself, but that would waste the rest of the trigger outputs.
 |
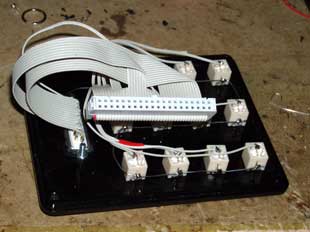 |
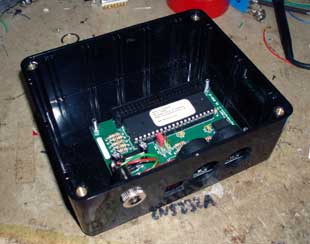
Work in progress building the interface box.
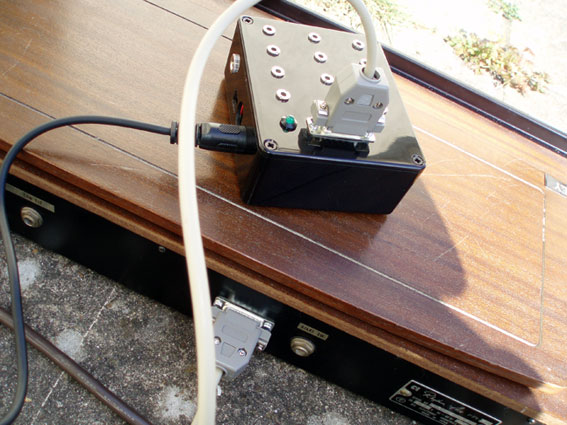
The interface unit connects to the drum machine via a D-sub cable we built for the purpose. Round the back of the drum machine we have added a new socket for this cable to connect
The next step is to convert the +5v triggers from the midi interface into something usable by the BRA. In order to do this we've built a circuit for every sound that uses a transistor inverter switch to amplify and invert the +5v input trigger so that its output swings from +12v to 0v when an input pulse is received. We then fed this into an exact copy of the edge detector circuit that can be found in the BRA to turn this into the required -12v spike. Remember, on the internal setup the edge detector triggers on the downward slope of its input trigger, so feeding a negative going pulse into the edge detector will give a tighter result than using a positive pulse. If you used a positive going pulse the actual sound would be triggered on its downward slope, which would be the width of the trigger pulse after when you actually pressed the midi note. In this case about 10ms.
If you want the sound to sound exactly the same as they do already we'd recommend using exactly the 0.039uF cap and 270K resistor. At least those are the values used in the internal BRA circuit. You can change the curve of the -12v spikes by altering these values. We've used a 2N5088 transistor here, but any general purpose transistor with similar specs will do the job.
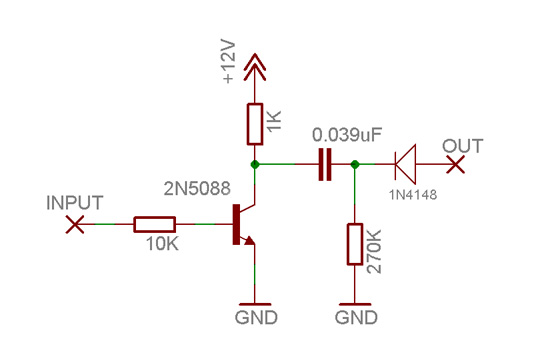
Bear in mind that you will have to build a copy of this circuit for every sound apart from the guiro (more on that one later). You won't find a +12v power rail in the drum machine so you'll have to wire up a 12v voltage regulator and use the 24v rail.
This is the original prototype circuitboard we came up with. See below for newer versions.
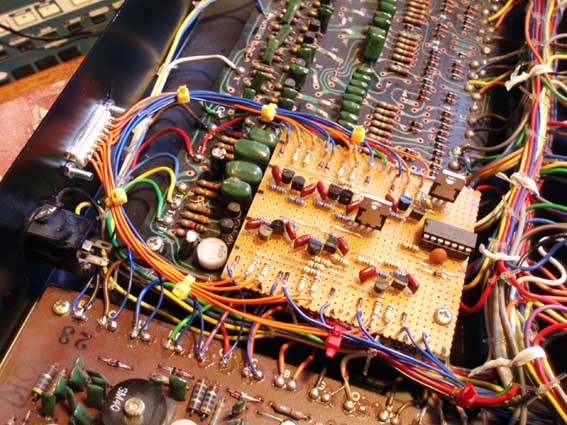
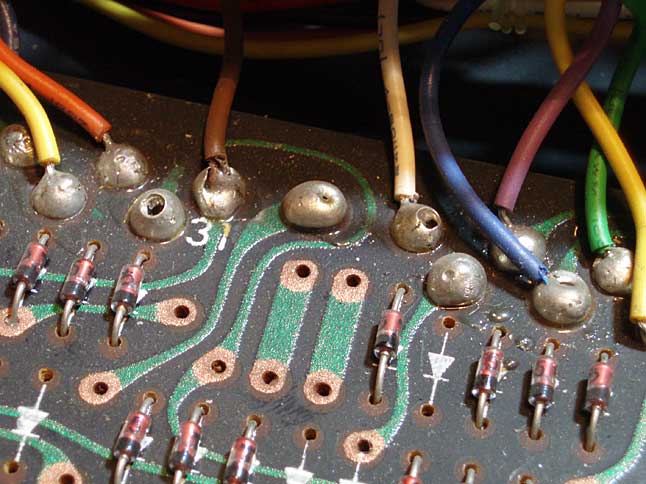
Next you need to wire the outputs of the conversion circuits to the trigger inputs of the synth board. You can see the locations of the inputs on the pictures below. They are all lined up along the edge of the board with the bass drum etc up one end and all the snare and cymbal sounds up the other.

 |
 |
On the images above you'll notice that the TB trigger input doesn't have a wire going to it. This is because the BRA doesn't have the tambourine sound where as the TR77 does.
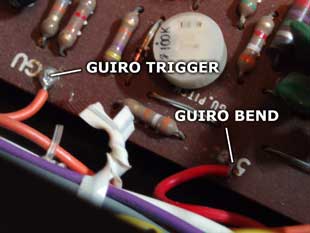
Don't wire anything to the Guiro yet. Whoever designed this thing must have loved the sound of the guiro as they went to a ridiculous amount of trouble to make it work right, but then only used it on two of the preset drum patterns...... very odd. The guiro sound needs a positive trigger pulse of at least 9v with a pulsewidth as long as the sounds last. When its being triggered internally theres also another +5v trigger than happens halfway through the guiro sound that acts as a kind of CV to raise the pitch of the tone.
We've managed to get the guiro working (without the pitch bend) using the circuit below. There are probably better ways of doing it but the diagram below will work. The circuit uses three inverters from one 40106 chip. Remember to ground the other inputs on pins 9, 11, and 13.
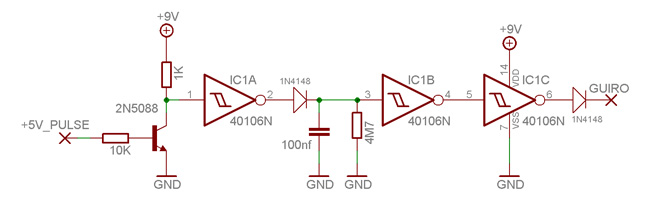
The length of the sound is set by the 4M7 resistor and the cap. Changing these values will change the length of the sound and you could conceivably use a pot in place of the resistor with the right cap to vary the length. Use a 9v regulator to get the 9v positive power.
You should note that in order for external triggering to sound right you have to make sure none of the pattern buttons are selected and then put the machine into play mode by tapping the weird metal play switch. This opens the VCA that normally silences the machine when you stop the playback, The fact that the designers felt the need to even add this VCA just goes to show how much noise and hum this thing produced even when brand new.
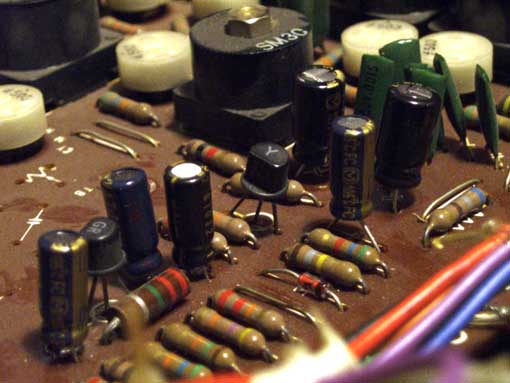
REFLOWING JOINTS:
On another note entirely. This machine has some of the worst soldering we have ever seen on any bit of kit, and thats up against some pretty stiff competition!
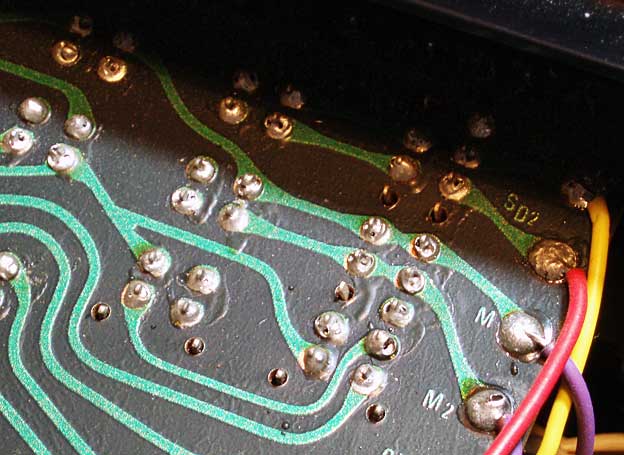
Most of the soldering on this thing is atrociously bad with endless fractured dry joints along with abscesses and bubbles in the solder. God knows what flux they were using in this thing but it bubbles like boiling water when you heat it. Those black marks on the solder joints are in fact bubble holes. Against all the odds about 90% of the connections still work on this unit but you'd probably be well advised to reflow anything that looks suspect.
LISTEN TO THE MP3 BELOW FOR A QUICK DEMO OF THIS MACHINE TRIGGERING VIA THE NEW MIDI INTERFACE.
A new page on converting the Roland TR77 to use a regulated external power supply can be found HERE
UPDATE:
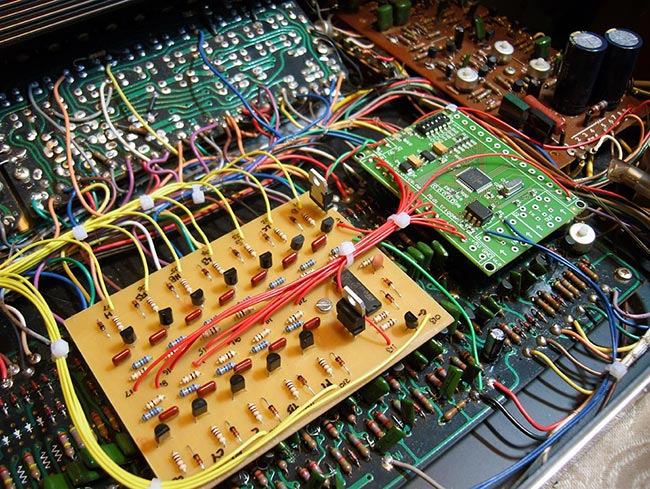
These are another couple of versions of this mod. The first image shows the new updated version of the engineers at work trigger interface with a better laid out CNC engraved PCB for the edge detector conversion. The second is a prototype single board TR77 midi interface we've been working on.
UPDATE 22/03/16:
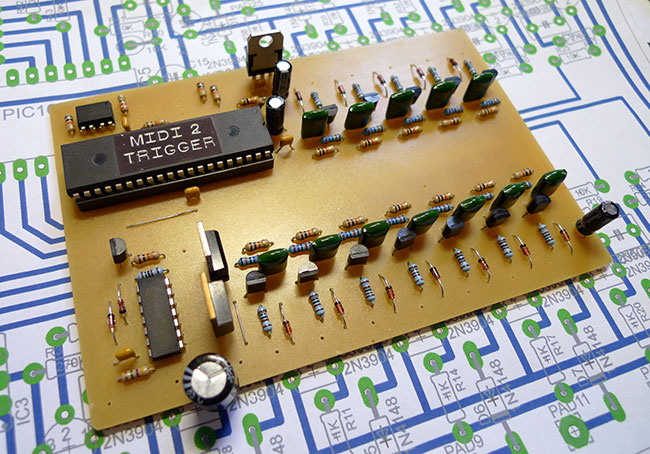
After a few requests, we have a limited number of DIY trigger interface PCB's available on the shop page.

The board accepts normal +5v analogue triggers, and converts them into the -12v spikes that drive the voice board.
It will allow you to directly trigger the voices of your FR8L / TR77 using a midi to trigger converter, modular synth, drum machine, or anything else that can provide standard +5v analogue triggers. Ther are 12 identical conversion channels, plus a dual output for the guiro sound.
Click HERE or on the image above to take a look.